Essential oils have become increasingly popular in recent years, with many people turning to them for their natural healing properties and pleasant scents. However, the production of essential oils can have a negative impact on the environment due to the use of chemicals and unsustainable practices. Making your own essential oils at home is not only a fun and rewarding DIY project, but it also helps reduce your carbon footprint and promotes a more sustainable lifestyle. In this article, we will discuss why making your own essential oils is better for the environment, what you need to get started, and the step-by-step process to make your own essential oils.
Why Essential Oils Can Be Harmful to the Environment
Essential oils are highly concentrated plant extracts that are used for their therapeutic and aromatic properties. They are typically extracted through steam distillation or cold pressing, which requires large amounts of plant material. This can lead to overharvesting and deforestation, especially in areas where essential oils are in high demand.
In addition, the production of essential oils often involves the use of pesticides, herbicides, and other chemicals that can harm the environment and contaminate the final product. These chemicals can also have a negative impact on the health of workers and local communities.
Furthermore, the packaging and transportation of essential oils contribute to carbon emissions and waste. Many essential oils come in single-use plastic bottles, which end up in landfills or polluting our oceans. The transportation of these products also adds to the carbon footprint, as they are often shipped from other countries.
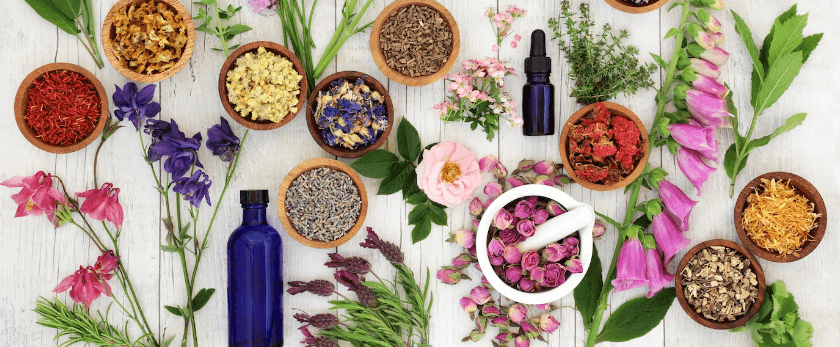
Why Making Your Own Essential Oils is Better for the Environment
Making your own essential oils at home eliminates the need for harmful chemicals and reduces the demand for commercially produced oils. By using natural and sustainable methods, you can help protect the environment and promote a more eco-friendly lifestyle.
In addition, making your own essential oils allows you to control the quality and purity of the final product. You can choose to use organic and ethically sourced plant materials, ensuring that your oils are free from harmful chemicals and pesticides.
Moreover, making your own essential oils reduces waste and carbon emissions. You can reuse glass bottles or containers to store your oils, and you won't have to rely on transportation to get your products. This not only reduces your carbon footprint but also saves you money in the long run.
What You Need to Get Started
Making your own essential oils requires some basic equipment and ingredients. Here's a list of what you'll need:
- Fresh or dried plant material (such as herbs, flowers, or citrus peels)
- Carrier oil (such as olive, coconut, or jojoba oil)
- Distilled water
- Glass jars or bottles with lids
- Cheesecloth or coffee filters
- A pot or slow cooker
- A thermometer
- A strainer
- A funnel
- Labels for your bottles
It's important to note that not all plants are suitable for making essential oils. Some plants may not have enough essential oil content, while others may be toxic or harmful. Do your research and make sure you are using safe and appropriate plant materials.
Step-by-Step Guide to Making Your Own Essential Oils
-
Choose your plant material: As mentioned earlier, not all plants are suitable for making essential oils. Choose plants that are known for their strong scents and therapeutic properties, such as lavender, peppermint, or lemon.
-
Prepare the plant material: If using fresh plant material, make sure to wash and dry it thoroughly. If using dried plant material, crush or chop it into small pieces to release the essential oils.
-
Infuse the plant material: Place the plant material in a pot or slow cooker and cover it with your carrier oil. The oil should completely cover the plant material. Heat the mixture on low heat for several hours, stirring occasionally. The heat will help extract the essential oils from the plant material.
-
Strain the mixture: Once the mixture has cooled, strain it through a cheesecloth or coffee filter into a clean glass jar or bottle. Squeeze out as much oil as possible from the plant material.
-
Repeat the process: You may need to repeat the infusion process with fresh carrier oil to extract more essential oils from the plant material. The strength of your essential oil will depend on how many times you repeat this process.
-
Let the oil settle: Let the oil sit for a few days to allow any sediment to settle at the bottom. This will help clarify the oil and make it easier to pour.
-
Decant the oil: Carefully pour the oil into a clean glass jar or bottle, leaving any sediment behind. You can use a funnel to make this process easier.
-
Label your oil: It's important to label your oil with the name of the plant, the date it was made, and any other relevant information. This will help you keep track of your oils and their properties.
-
Store your oil: Store your essential oil in a cool, dark place to preserve its potency. Make sure to use it within a year for maximum effectiveness.
Responsible Disposal of Plant Material
After extracting the essential oils, you may be wondering what to do with the leftover plant material. It's important to dispose of it responsibly to avoid any negative impact on the environment.
One option is to compost the plant material. This will not only reduce waste but also provide valuable nutrients for your garden. You can also use the plant material as a natural air freshener by placing it in a bowl or sachet.
Conclusion
Making your own essential oils is a simple and rewarding process that not only benefits your health but also the environment. By using natural and sustainable methods, you can reduce your carbon footprint and promote a more eco-friendly lifestyle. So why not give it a try and start making your own essential oils today? Your body and the planet will thank you.

