Welcome to the world of homemade jars! In today's society, we are constantly bombarded with single-use plastic products that harm our environment. From plastic water bottles to food containers, these items end up in landfills and oceans, taking hundreds of years to decompose and causing harm to wildlife and ecosystems.
But there is a solution – making your own jars at home! Not only is it a fun and creative activity, but it also helps reduce our carbon footprint and promotes a more sustainable lifestyle. In this article, we will discuss why store-bought jars are bad for the environment, the benefits of making your own, and provide a step-by-step guide on how to make your own homemade jars.
Why Store-Bought Jars are Bad for the Environment
Store-bought jars, whether they are made of plastic or glass, have a significant impact on the environment. Here are some reasons why:
Single-Use Plastic
Plastic jars are one of the most common types of packaging used for food and other products. However, they are also one of the biggest contributors to plastic pollution. According to National Geographic, only 9% of plastic is recycled, and the rest ends up in landfills or the environment. This plastic takes hundreds of years to decompose, releasing harmful chemicals into the soil and water.
Energy and Resources Used in Production
The production of store-bought jars requires a significant amount of energy and resources. From extracting raw materials to manufacturing and transportation, the process contributes to carbon emissions and depletes natural resources. Additionally, the packaging and labeling of these jars also require energy and resources, adding to the overall environmental impact.
Difficulty in Recycling
While glass jars are more easily recyclable than plastic, they still pose challenges in the recycling process. Glass jars need to be sorted by color, and any contamination, such as food residue, can render them unrecyclable. This makes it difficult for recycling facilities to process them, and they often end up in landfills.
Benefits of Making Your Own Jars
Making your own jars at home has numerous benefits for both the environment and your wallet. Here are some reasons why you should consider making your own jars:
Reduces Waste
By making your own jars, you are reducing the amount of waste that ends up in landfills. Instead of buying single-use plastic or glass jars, you can reuse and repurpose items you already have at home, such as glass bottles or jars from food products.
Saves Money
Making your own jars can also save you money in the long run. Instead of constantly buying new jars, you can reuse and repurpose old ones, reducing the need to purchase new ones. This can also save you money on packaging and labeling costs.
Customizable and Creative
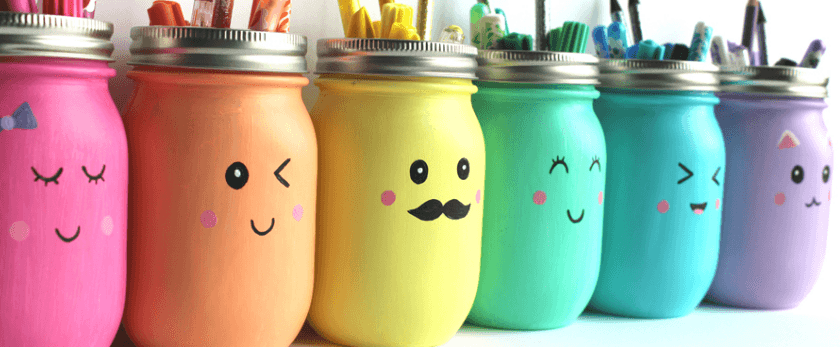
Making your own jars allows you to get creative and customize them to your liking. You can choose the size, shape, and design of your jars, making them unique and personalized. This can also make for a fun and engaging activity for families, friends, or even as a DIY project.
Promotes a Sustainable Lifestyle
By making your own jars, you are promoting a more sustainable lifestyle. You are reducing your carbon footprint and contributing to a circular economy by reusing and repurposing items instead of constantly buying new ones.
What You Will Need
Before we dive into the steps of making your own jars, here are some essential items you will need:
- Glass bottles or jars (can be repurposed from food products or purchased from a thrift store)
- Labels (optional)
- Paint or markers (optional)
- Hot glue gun (optional)
- Scissors
- Twine or ribbon (optional)
- Decorative items (optional)
How to Make Your Own Jars
Now that you have all the necessary items, let's get started on making your own jars! Follow these simple steps to create your own homemade jars:
Step 1: Clean and Prepare Your Jars
If you are repurposing glass bottles or jars, make sure to thoroughly clean them with soap and water. Remove any labels or residue, and let them dry completely before moving on to the next step.
Step 2: Decorate Your Jars (Optional)
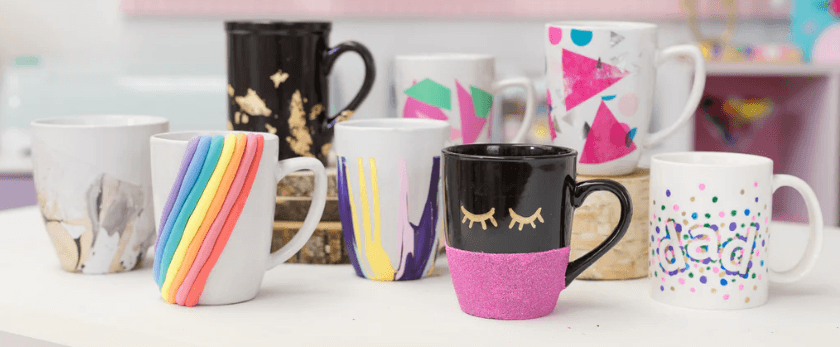
This step is optional but can add a personal touch to your jars. You can use paint, markers, or even hot glue to decorate your jars. Get creative and let your imagination run wild!
Step 3: Label Your Jars (Optional)
If you plan on using your jars for food or other products, labeling them is essential. You can use pre-made labels or create your own using paper and markers. Make sure to include the contents and date on the label.
Step 4: Add a Lid (Optional)
If your jars do not have a lid, you can create one using a piece of fabric or paper and a rubber band. This will help keep the contents of your jar fresh and prevent spills.
Step 5: Add Decorative Touches (Optional)
To make your jars even more unique, you can add decorative touches such as twine, ribbon, or other decorative items. This step is entirely up to your personal preference and creativity.
Responsible Disposal of Homemade Jars
Once you have used your homemade jars, it is essential to dispose of them responsibly. Here are some tips on how to do so:
- If your jars are made of glass, they can be recycled. Make sure to clean them thoroughly before placing them in the recycling bin.
- If your jars are made of plastic, check with your local recycling facility to see if they accept plastic jars. If not, consider repurposing them for storage or other DIY projects.
- If your jars are made of other materials, such as paper or fabric, they can be composted or recycled depending on the material.
- If your jars are still in good condition, consider donating them to a thrift store or giving them to someone who can reuse them.
Conclusion
In conclusion, making your own jars at home is a simple and effective way to reduce your environmental impact and promote a more sustainable lifestyle. By reusing and repurposing items, you are not only reducing waste but also saving money and getting creative. So next time you need a jar, skip the store-bought option and make your own – your wallet and the planet will thank you!
