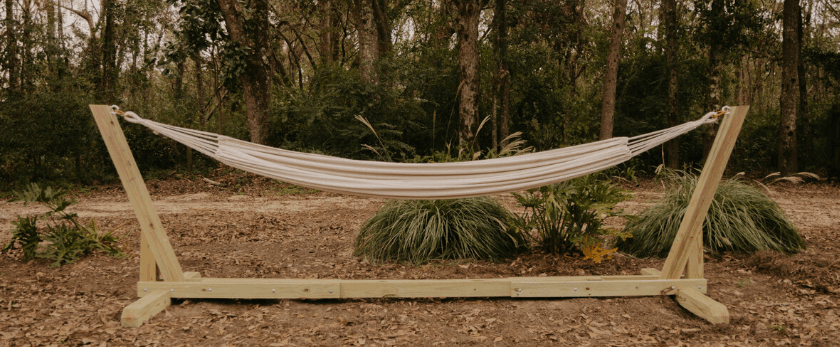
Are you looking for a way to reduce your carbon footprint and live a more eco-friendly lifestyle? Look no further than your own backyard! Making your own hammock is not only a fun and creative project, but it also helps reduce waste and promotes sustainability. In this article, we will discuss why store-bought hammocks are harmful to the environment, the benefits of making your own, and provide step-by-step instructions on how to create your own homemade hammock.
The Environmental Impact of Store-Bought Hammocks
While hammocks may seem like a harmless and relaxing addition to your outdoor space, the truth is that they can have a significant impact on the environment. Here are some reasons why:
- Production Process: Most store-bought hammocks are made from synthetic materials such as nylon or polyester, which are derived from non-renewable resources. The production of these materials requires a significant amount of energy and emits harmful greenhouse gases into the atmosphere.
- Packaging and Shipping: The packaging and shipping of store-bought hammocks also contribute to their environmental impact. The use of plastic packaging and long-distance transportation increases carbon emissions and adds to the growing problem of plastic pollution.
- Disposal: When store-bought hammocks reach the end of their lifespan, they often end up in landfills where they can take hundreds of years to decompose. This not only takes up valuable space but also releases harmful chemicals into the environment.

The Benefits of Homemade Hammocks
Making your own hammock may seem like a daunting task, but the benefits far outweigh the effort. Here are some reasons why making your own hammock is better for the environment:
- Reduced Waste: By making your own hammock, you are reducing the amount of waste that goes into landfills. You can use materials that are already available in your home or repurpose old fabrics, reducing the need for new materials.
- Sustainable Materials: Instead of using synthetic materials, you can opt for more sustainable options such as organic cotton, hemp, or bamboo. These materials are biodegradable and have a lower environmental impact.
- Customizable: Making your own hammock allows you to customize it to your liking. You can choose the size, color, and design, making it a unique and personal addition to your outdoor space.
- Cost-effective: Homemade hammocks are often more cost-effective than store-bought ones. You can save money by using materials you already have or by purchasing sustainable materials in bulk.
- Educational: Making your own hammock is a great way to learn new skills and teach others about sustainability. You can involve your family, friends, or community in the process and spread awareness about the importance of reducing waste.
What You Will Need
Before we dive into the steps of making a homemade hammock, here are the materials and tools you will need:
- Fabric: You can use any type of fabric, but we recommend using a durable and breathable material such as cotton, canvas, or linen.
- Rope or Cord: You will need a strong and sturdy rope or cord to support the weight of the hammock. Natural materials such as hemp or jute are ideal.
- Scissors
- Sewing Machine or Needle and Thread
- Measuring Tape
- Wooden Dowels or Poles (optional)
Step-by-Step Instructions
Now that you have all the necessary materials, let's get started on making your own homemade hammock!
Step 1: Measure and Cut the Fabric
The first step is to measure and cut the fabric to the desired size. The standard size for a hammock is approximately 4 feet wide and 8-10 feet long. You can adjust the size according to your preference and available space.
Step 2: Hem the Edges
To prevent the fabric from fraying, hem the edges of the fabric using a sewing machine or by hand. Fold the edges over twice and sew them in place.
Step 3: Create the Loops
On each end of the fabric, create loops by folding the fabric over and sewing it in place. These loops will be used to attach the rope or cord.
Step 4: Cut and Attach the Rope
Cut two pieces of rope or cord, each measuring twice the length of the hammock. Thread one end of the rope through the loop on one end of the fabric and tie a knot to secure it. Repeat on the other end of the fabric.
Step 5: Hang the Hammock
Find two sturdy trees or posts to hang your hammock between. Wrap the rope around the tree or post and tie a secure knot. Repeat on the other side.
Optional Step: Add Wooden Dowels or Poles
If you want to add extra support and stability to your hammock, you can insert wooden dowels or poles through the loops on each end of the fabric. This will also prevent the fabric from bunching up in the middle.
Congratulations, you have successfully made your own homemade hammock! Now it's time to relax and enjoy the fruits of your labor.
Responsible Disposal of Old Hammocks
If you have an old store-bought hammock that you no longer use, it's important to dispose of it responsibly. Here are some options:
- Donate: If your hammock is still in good condition, consider donating it to a local charity or thrift store.
- Repurpose: You can repurpose your old hammock into a new item such as a tote bag, pet bed, or outdoor rug.
- Recycle: Some materials, such as nylon, can be recycled. Check with your local recycling center to see if they accept hammocks.
- Proper Disposal: If none of the above options are available, make sure to dispose of your hammock properly by cutting it into smaller pieces and placing it in a designated trash bin.
Conclusion
In conclusion, making your own homemade hammock is not only a fun and creative project, but it also promotes sustainability and reduces waste. By using sustainable materials and involving your community, you can make a positive impact on the environment and inspire others to do the same. So why not give it a try and make your own homemade hammock today? Your backyard (and the planet) will thank you.


