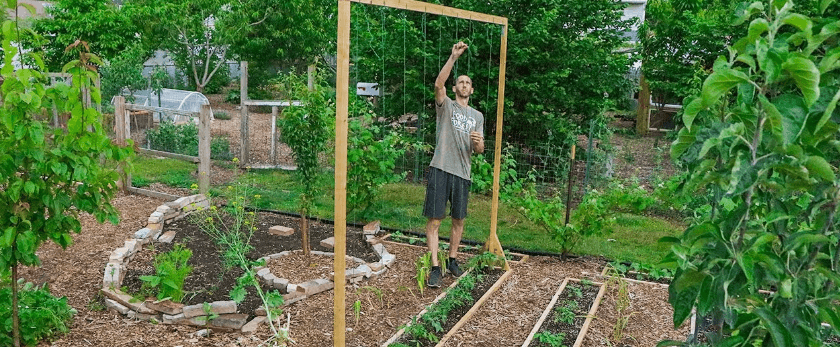
Are you looking for a way to add structure and support to your garden while also reducing your environmental impact? Look no further than homemade garden trellises! These simple and cost-effective structures not only provide support for your plants, but they also help reduce waste and promote a more sustainable lifestyle. In this article, we'll discuss why traditional garden trellises can be harmful to the environment, the benefits of making your own, and provide step-by-step instructions for creating your own homemade garden trellis.
The Environmental Impact of Traditional Garden Trellises
Traditional garden trellises are typically made from materials such as plastic, metal, or treated wood. While these materials may seem harmless, they can actually have a negative impact on the environment.
Plastic Trellises
Plastic trellises are often made from non-biodegradable materials, meaning they will not break down naturally over time. This can lead to them ending up in landfills or polluting our oceans and waterways. Additionally, the production of plastic releases harmful greenhouse gases into the atmosphere, contributing to climate change.
Metal Trellises
Metal trellises are often made from steel or aluminum, both of which require a significant amount of energy to produce. This energy consumption contributes to carbon emissions and can also lead to the depletion of natural resources. Additionally, metal trellises can rust and corrode over time, creating potential hazards for both humans and wildlife.
Treated Wood Trellises
Treated wood trellises are often made from pressure-treated lumber, which is treated with chemicals to prevent rot and insect damage. These chemicals can leach into the soil and water, potentially harming plants and wildlife. Additionally, the production of pressure-treated lumber requires the use of toxic chemicals, which can have negative impacts on both human health and the environment.
The Benefits of Homemade Garden Trellises
Making your own garden trellis not only reduces your environmental impact, but it also has several other benefits.
Cost-Effective
Homemade garden trellises can be made from materials that are often readily available and inexpensive, such as bamboo, twine, or reclaimed wood. This makes them a cost-effective option for those on a budget.
Customizable
When making your own garden trellis, you have the freedom to customize it to fit your specific needs and preferences. You can choose the size, shape, and materials that work best for your garden and plants.
Sustainable
By using sustainable materials and reducing waste, homemade garden trellises promote a more sustainable lifestyle. They also have a longer lifespan than traditional trellises, reducing the need for frequent replacements.
What You'll Need
Before getting started, gather the following materials:
- Bamboo poles or reclaimed wood
- Twine or garden wire
- Scissors or wire cutters
- Drill (optional)
- Nails or screws (optional)
Step-by-Step Instructions
Step 1: Gather Materials
As mentioned earlier, you'll need bamboo poles or reclaimed wood, twine or garden wire, scissors or wire cutters, and a drill (optional).
Step 2: Determine the Size and Shape
Decide on the size and shape of your trellis. This will depend on the size of your garden and the plants you'll be supporting. For example, if you have tall plants, you may want a taller trellis, while shorter plants may only require a shorter trellis.
Step 3: Cut the Poles or Wood
Using scissors or wire cutters, cut the bamboo poles or reclaimed wood to the desired length. If using wood, you may need to use a saw to cut the pieces to the correct size.
Step 4: Drill Holes (Optional)
If using wood, you may want to drill holes in the pieces to make it easier to thread the twine or wire through. This step is optional, but it can make the process easier.
Step 5: Assemble the Trellis
Lay out the poles or wood pieces in the desired shape and begin tying them together with twine or garden wire. Start at the top and work your way down, making sure to secure each piece tightly. You can also use nails or screws to secure the pieces together for added stability.
Step 6: Add Crossbars (Optional)
If desired, you can add crossbars to your trellis for additional support. Simply tie or nail them in place, making sure they are evenly spaced.
Step 7: Place in the Garden
Once your trellis is assembled, place it in your garden where you want it to support your plants. You may need to use stakes or anchors to secure it in place.
Responsible Disposal of Old Trellises
If you already have a traditional garden trellis that you no longer need, it's important to dispose of it responsibly. Instead of throwing it away, consider repurposing it for another use in your garden or donating it to a local community garden or school. If it is no longer usable, make sure to recycle it properly according to your local recycling guidelines.
Conclusion
Homemade garden trellises are a simple and sustainable solution for supporting your plants while reducing your environmental impact. By using sustainable materials and reducing waste, you can create a trellis that is not only functional but also promotes a more eco-friendly lifestyle. So why not give it a try and see the benefits for yourself? Your garden and the planet will thank you.
