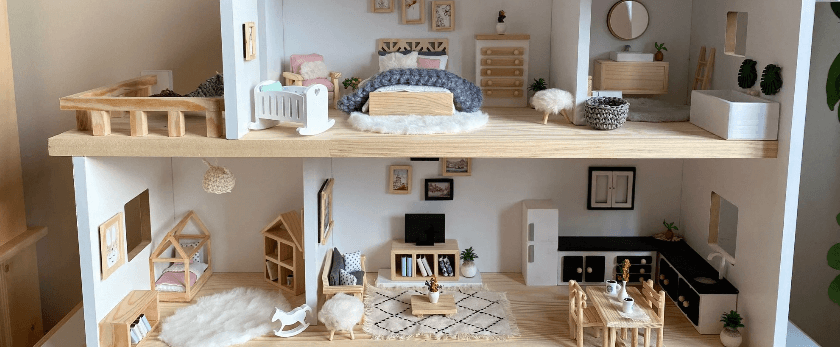
Welcome to the world of homemade dollhouses! In today's society, we are constantly bombarded with advertisements and products that promote a consumerist lifestyle. However, this lifestyle comes at a cost to our planet. The production and disposal of these products contribute to pollution, waste, and the depletion of natural resources.
But fear not, there is a solution – making your own dollhouse! Not only is it a fun and creative activity, but it also has a positive impact on the environment. In this article, we will discuss why store-bought dollhouses are bad for the environment, the benefits of making your own, what you need to get started, and step-by-step directions to create your own eco-friendly dollhouse.
Why Store-Bought Dollhouses are Bad for the Environment
-
Production Process: The production of store-bought dollhouses involves the use of materials such as plastic, wood, and paint, which require a significant amount of energy and resources. This process contributes to air and water pollution, as well as the emission of greenhouse gases.
-
Packaging: Dollhouses are often packaged in excessive amounts of plastic and cardboard, which end up in landfills and take hundreds of years to decompose. This adds to the already growing problem of waste management.
-
Transportation: Most store-bought dollhouses are manufactured in other countries and then shipped to their final destination, resulting in a large carbon footprint. This transportation also contributes to air pollution and the depletion of fossil fuels.
-
Short Lifespan: Many store-bought dollhouses are made with cheap materials and are not built to last. This leads to frequent replacements, which further adds to the environmental impact of production and disposal.
Why Making Your Own is Better for the Environment
-
Use of Recycled Materials: Making your own dollhouse allows you to use materials that would otherwise end up in landfills. This includes items such as cardboard boxes, old fabric, and scrap wood. By repurposing these materials, you are reducing waste and giving them a new life.
-
Less Energy and Resources: Homemade dollhouses require less energy and resources to create compared to store-bought ones. You can use materials that are already available in your home, reducing the need for new production and transportation.
-
Customizable and Durable: When you make your own dollhouse, you have the freedom to customize it to your liking and make it as durable as you want. This means you can create a dollhouse that will last for years to come, reducing the need for frequent replacements.
-
Educational Opportunity: Making a dollhouse from scratch is a great opportunity to teach children about the importance of sustainability and responsible consumption. It also allows them to use their creativity and problem-solving skills.
What You Need to Get Started
-
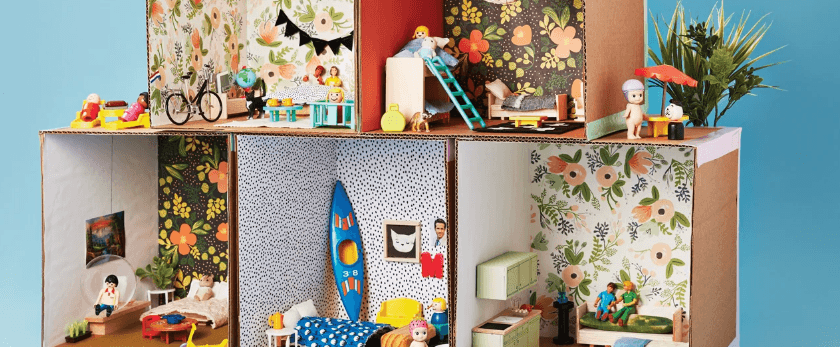
Materials: The materials you will need will depend on the type of dollhouse you want to make. Some basic materials include cardboard boxes, scrap wood, fabric, paint, glue, and scissors. You can also use recycled materials such as old magazines, newspapers, and bottle caps to add unique details to your dollhouse.
-
Tools: You will need some basic tools such as a ruler, pencil, craft knife, and paintbrushes. If you are using wood, you may also need a saw and sandpaper.
-
Imagination: The most important thing you need is your imagination! Let your creativity run wild and think outside the box when it comes to materials and design.
Step-by-Step Directions
-
Plan and Design: The first step is to plan and design your dollhouse. Decide on the size, shape, and layout of your dollhouse. You can draw a rough sketch or use a dollhouse template as a guide.
-
Gather Materials: Once you have a design in mind, gather all the materials you will need. Look for items around your home that can be repurposed, such as cardboard boxes, old fabric, and scrap wood.
-
Build the Structure: Using your design as a guide, start building the structure of your dollhouse. You can use cardboard boxes to create the walls and floors, and scrap wood for the roof and furniture. Use a craft knife to cut out windows and doors.
-
Add Details: This is where you can get creative and add unique details to your dollhouse. Use recycled materials such as bottle caps, buttons, and fabric scraps to create furniture, decorations, and accessories.
-
Paint and Decorate: Once the structure is complete, it's time to paint and decorate your dollhouse. Use non-toxic, water-based paint to add color and personality to your creation. You can also use markers, stickers, and other craft supplies to add details.
-
Let it Dry: Allow your dollhouse to dry completely before moving on to the next step. This may take a few hours, depending on the type of materials and paint used.
-
Play and Enjoy: Your homemade dollhouse is now ready to be played with and enjoyed! You can continue to add details and make changes as you please.
Responsible Disposal
When it's time to say goodbye to your dollhouse, it's important to dispose of it responsibly. If it's still in good condition, consider donating it to a local charity or giving it to a friend or family member. If it's no longer usable, make sure to recycle any materials that can be recycled and properly dispose of the rest.
Conclusion
In conclusion, making your own dollhouse is not only a fun and creative activity, but it also has a positive impact on the environment. By using recycled materials and reducing waste, you are taking a step towards a more sustainable future. So next time you or your child wants a new dollhouse, consider making one instead of buying it. Your wallet and the planet will thank you!
